Quick Start
Install PixelLift and run your first export in under 2 minutes.
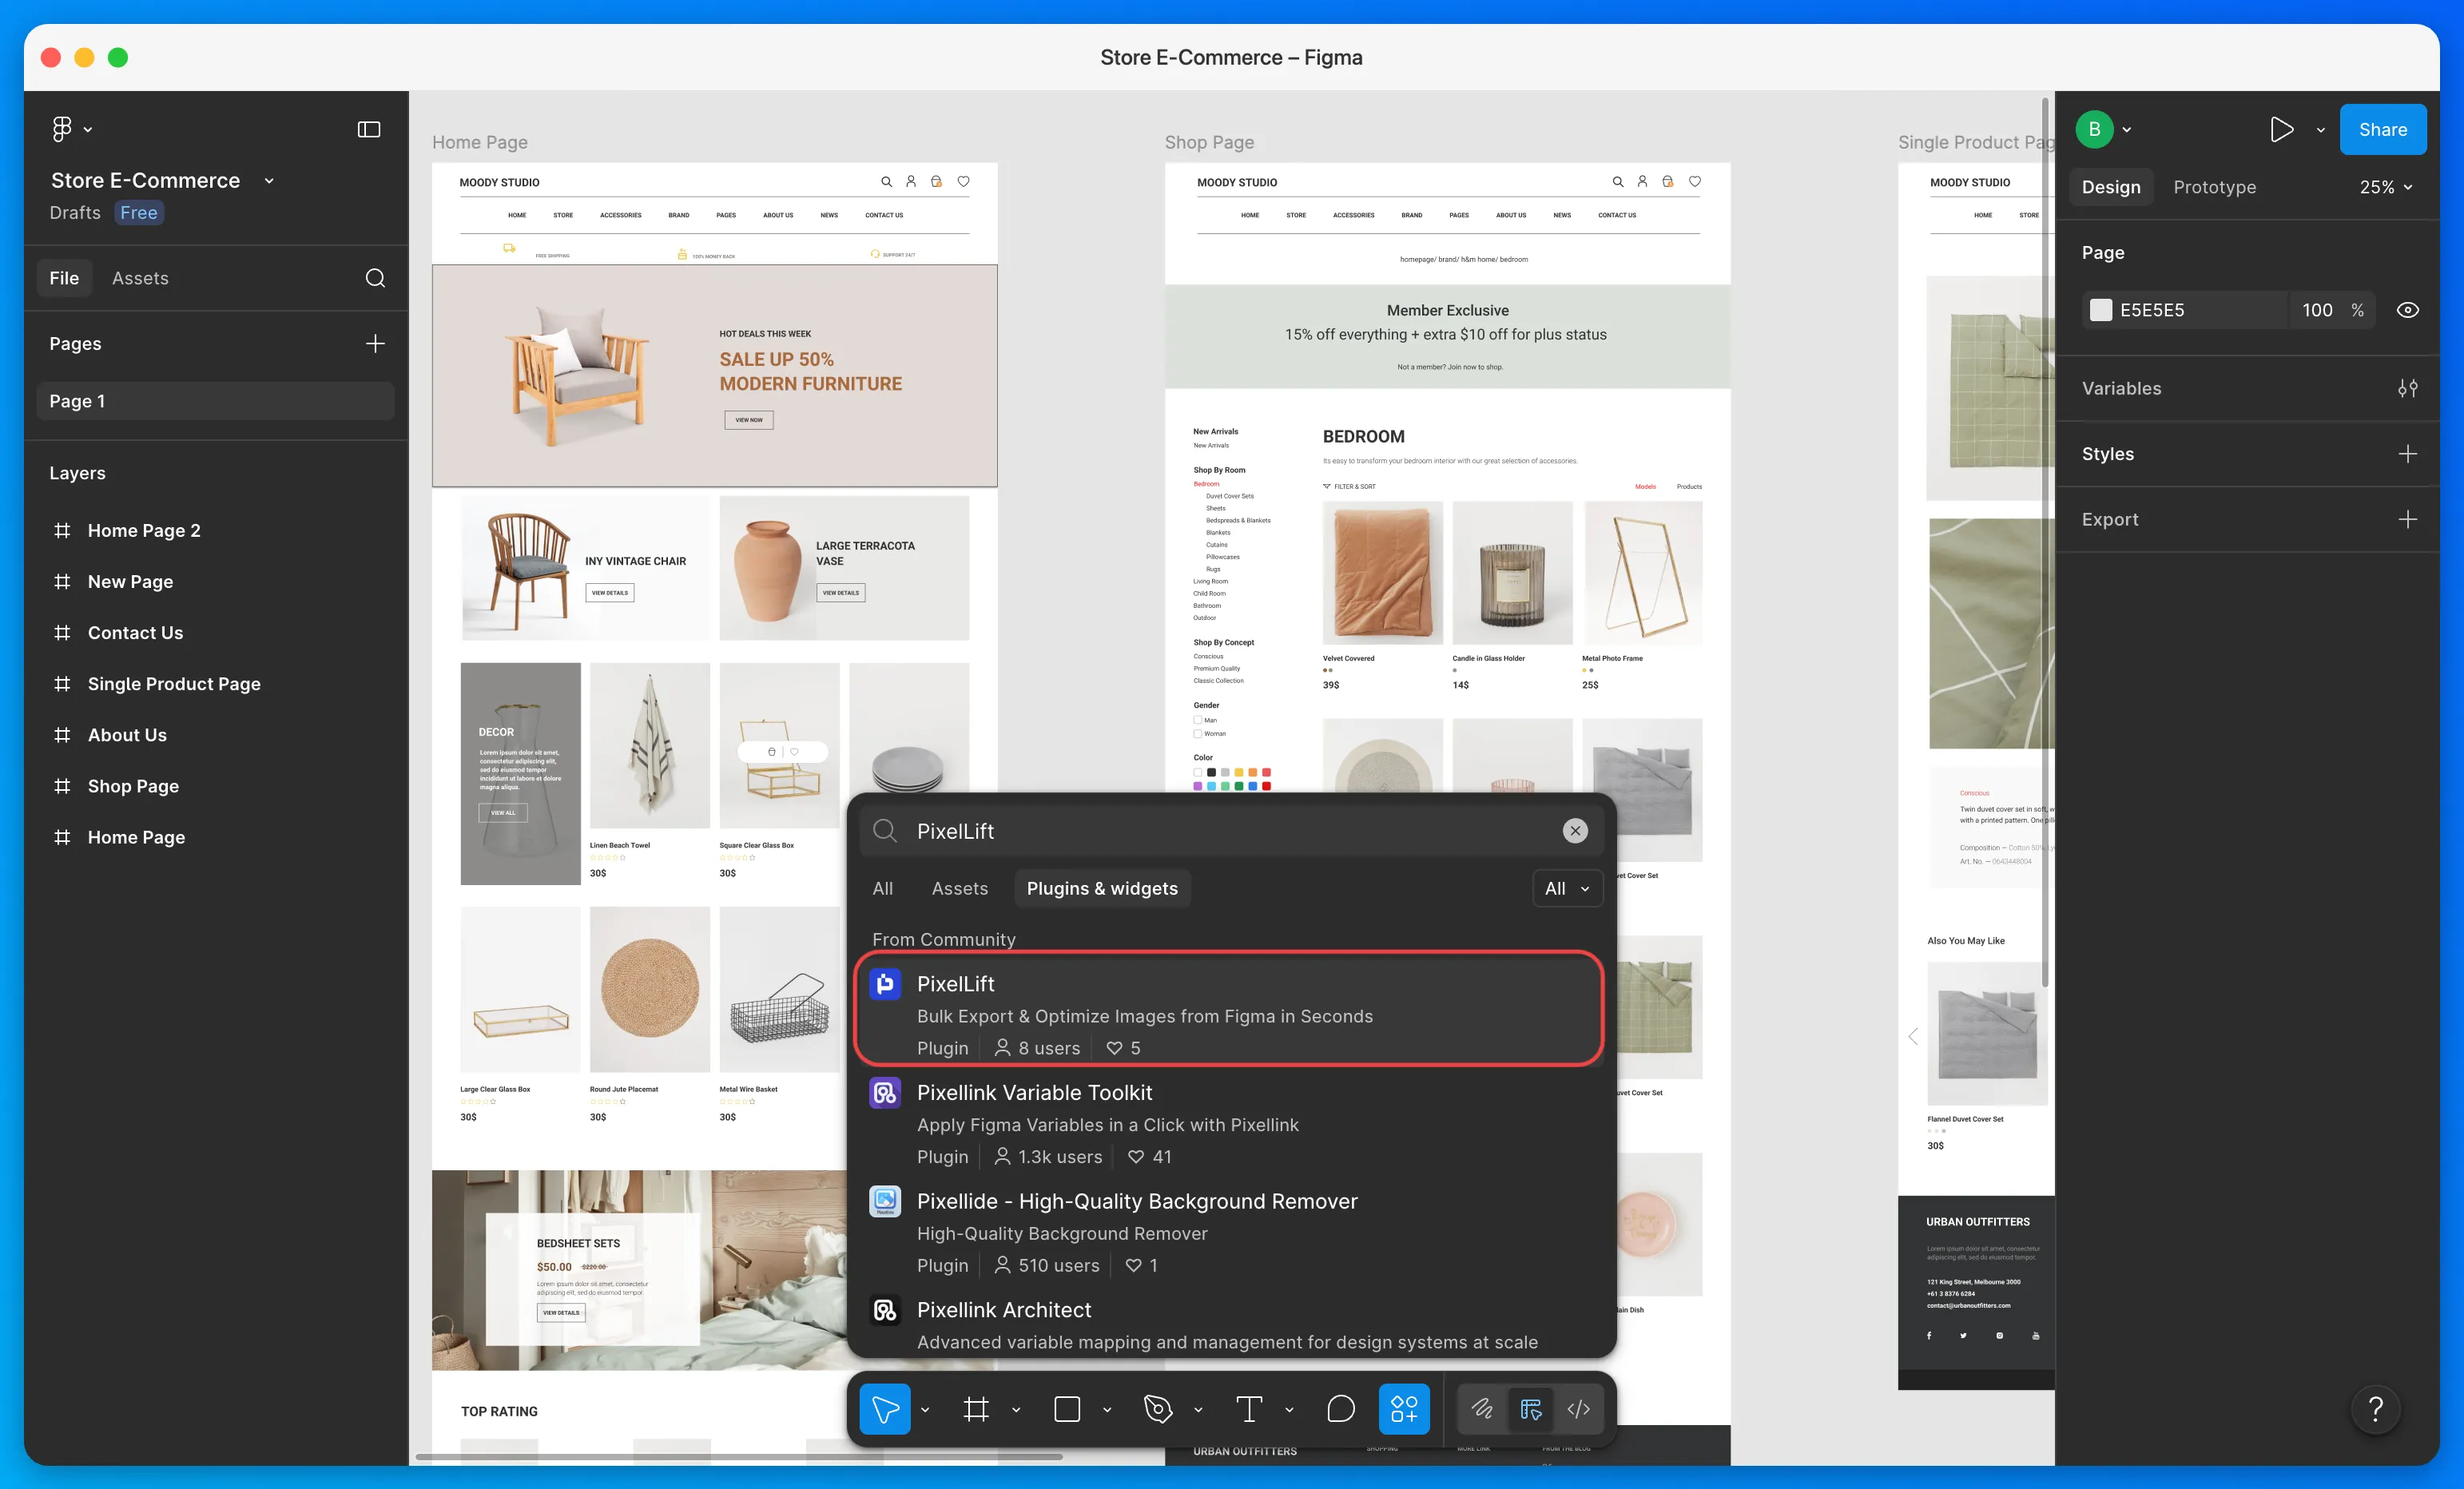
Step 1: Install the Plugin
Search for PixelLift in the Figma Community and click Install. No account needed to get started. You get 10 free credits automatically on your first use.
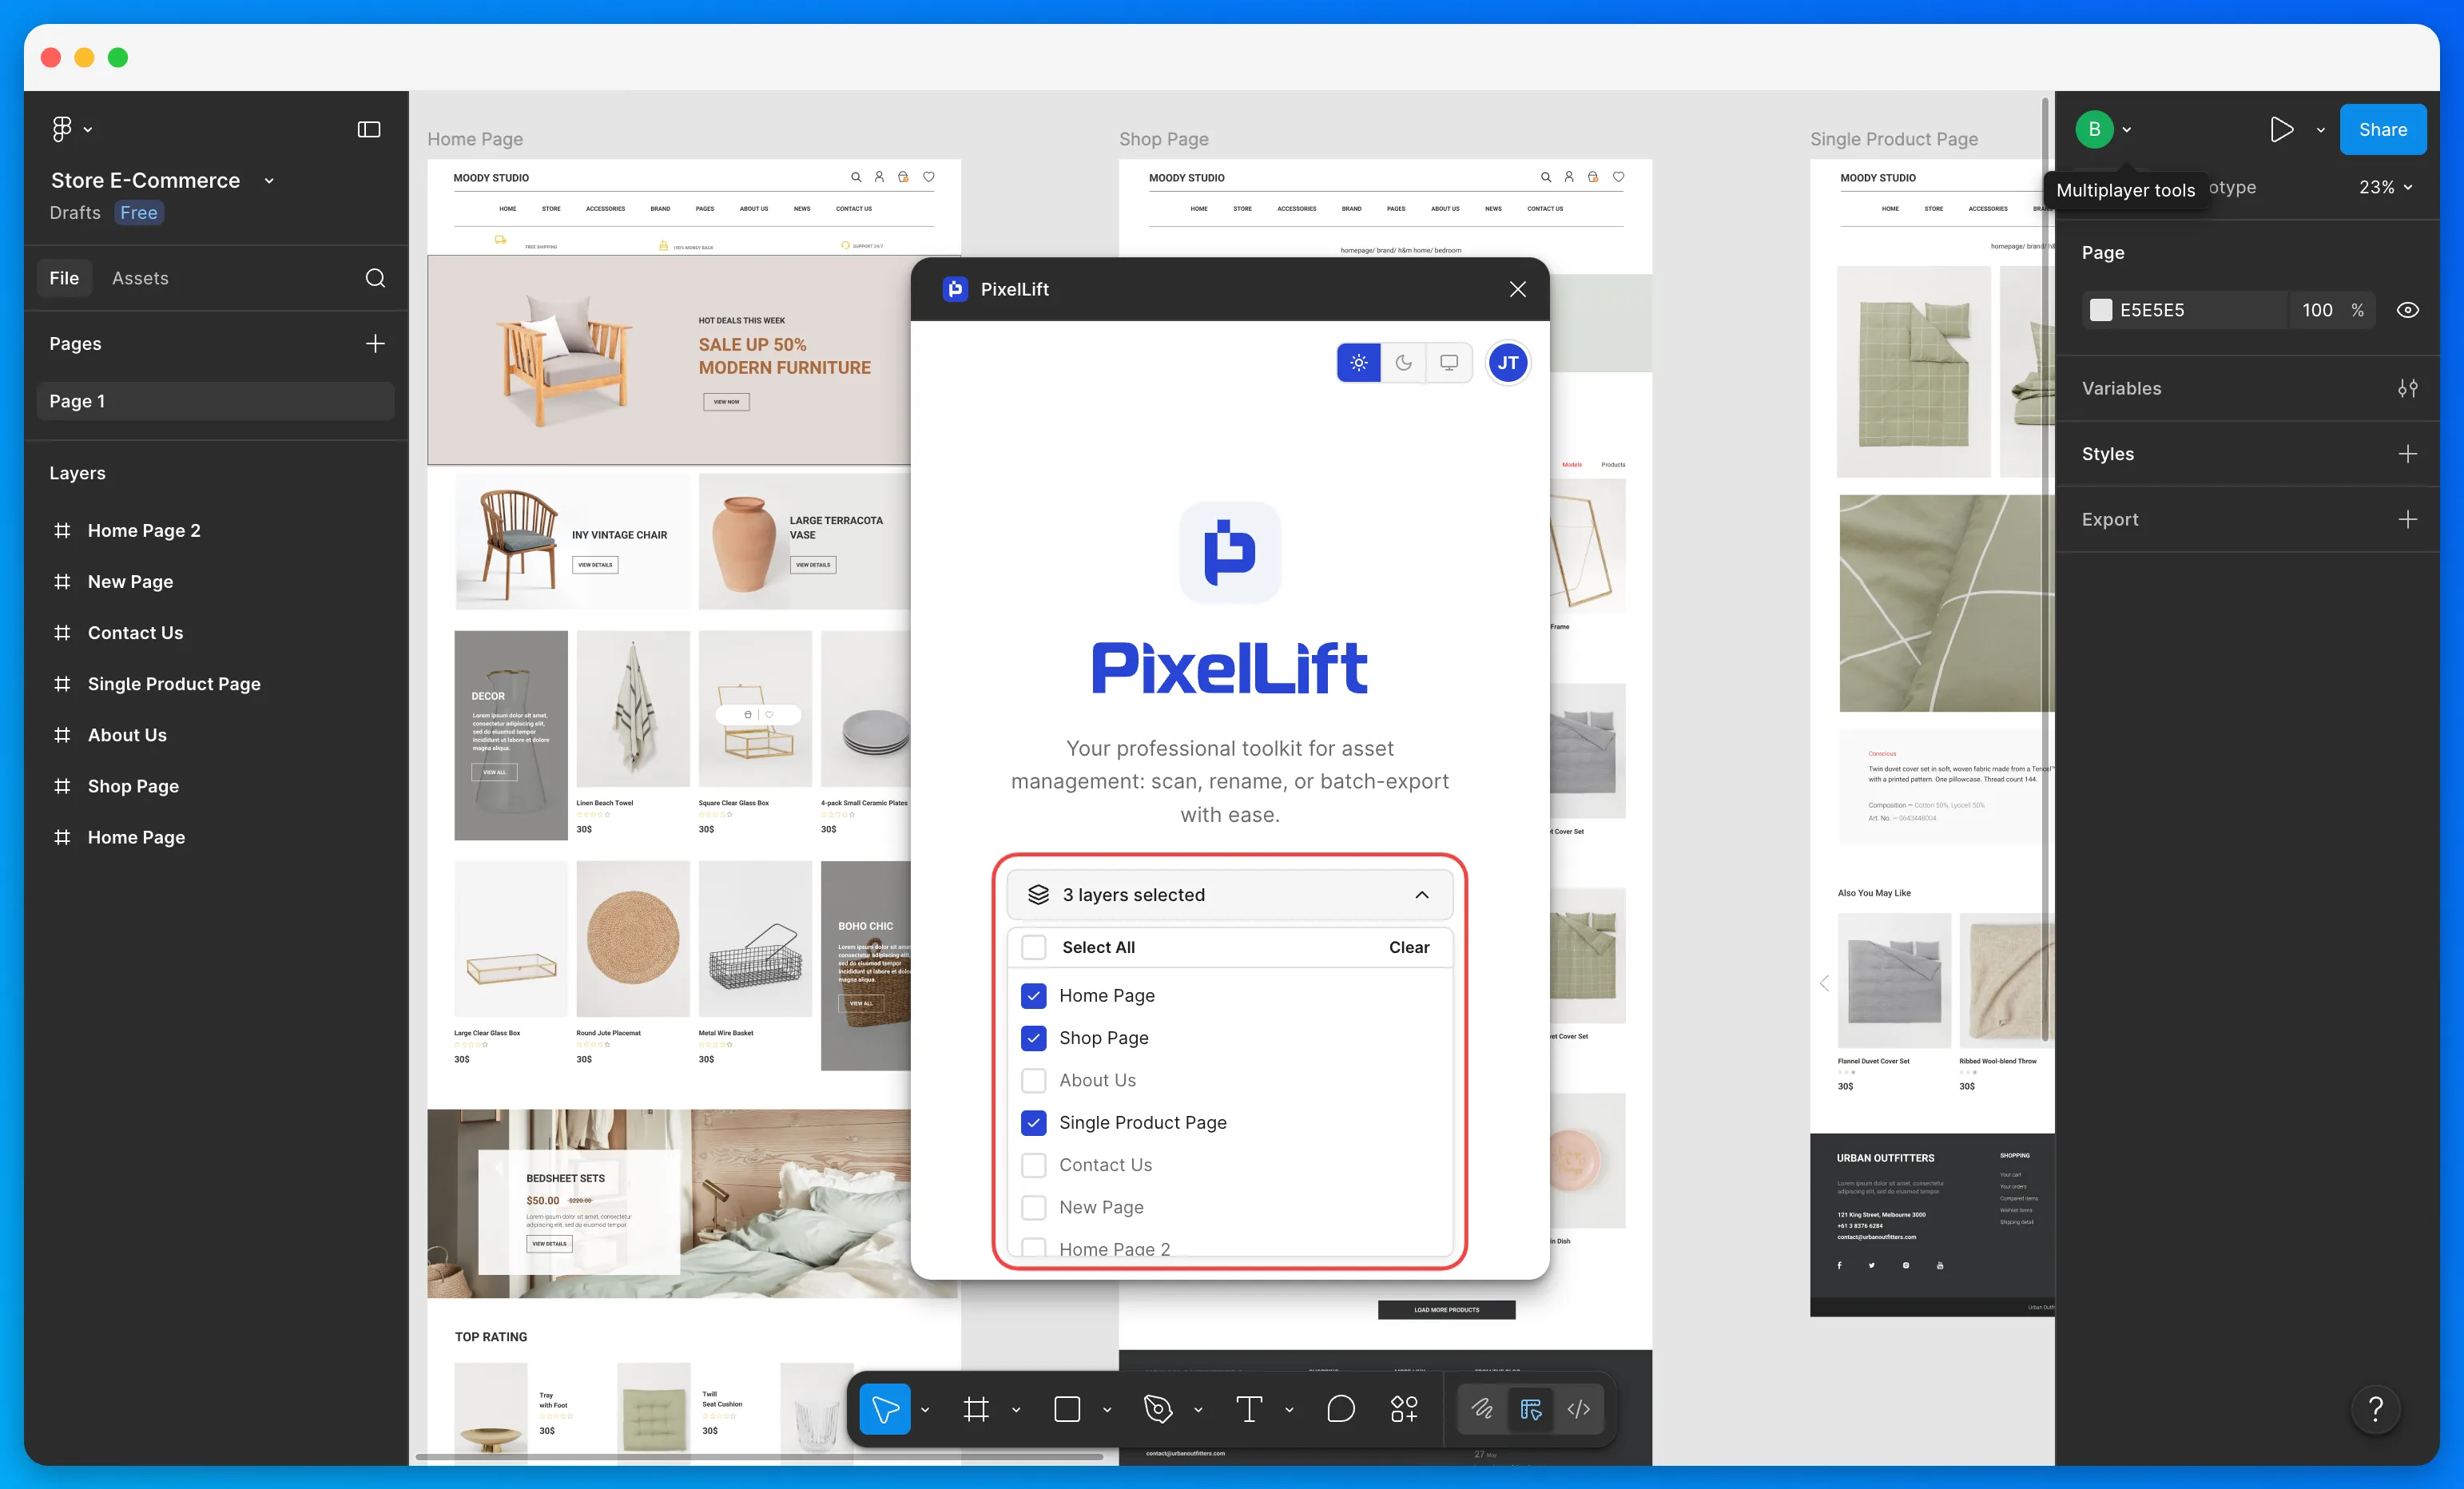
Step 2: Select Your Layers
In your Figma file, select the layers you want to export. You can select frames, groups, or nested components. Open PixelLift from Plugins > PixelLift and use the Choose layers dropdown to confirm your selection.
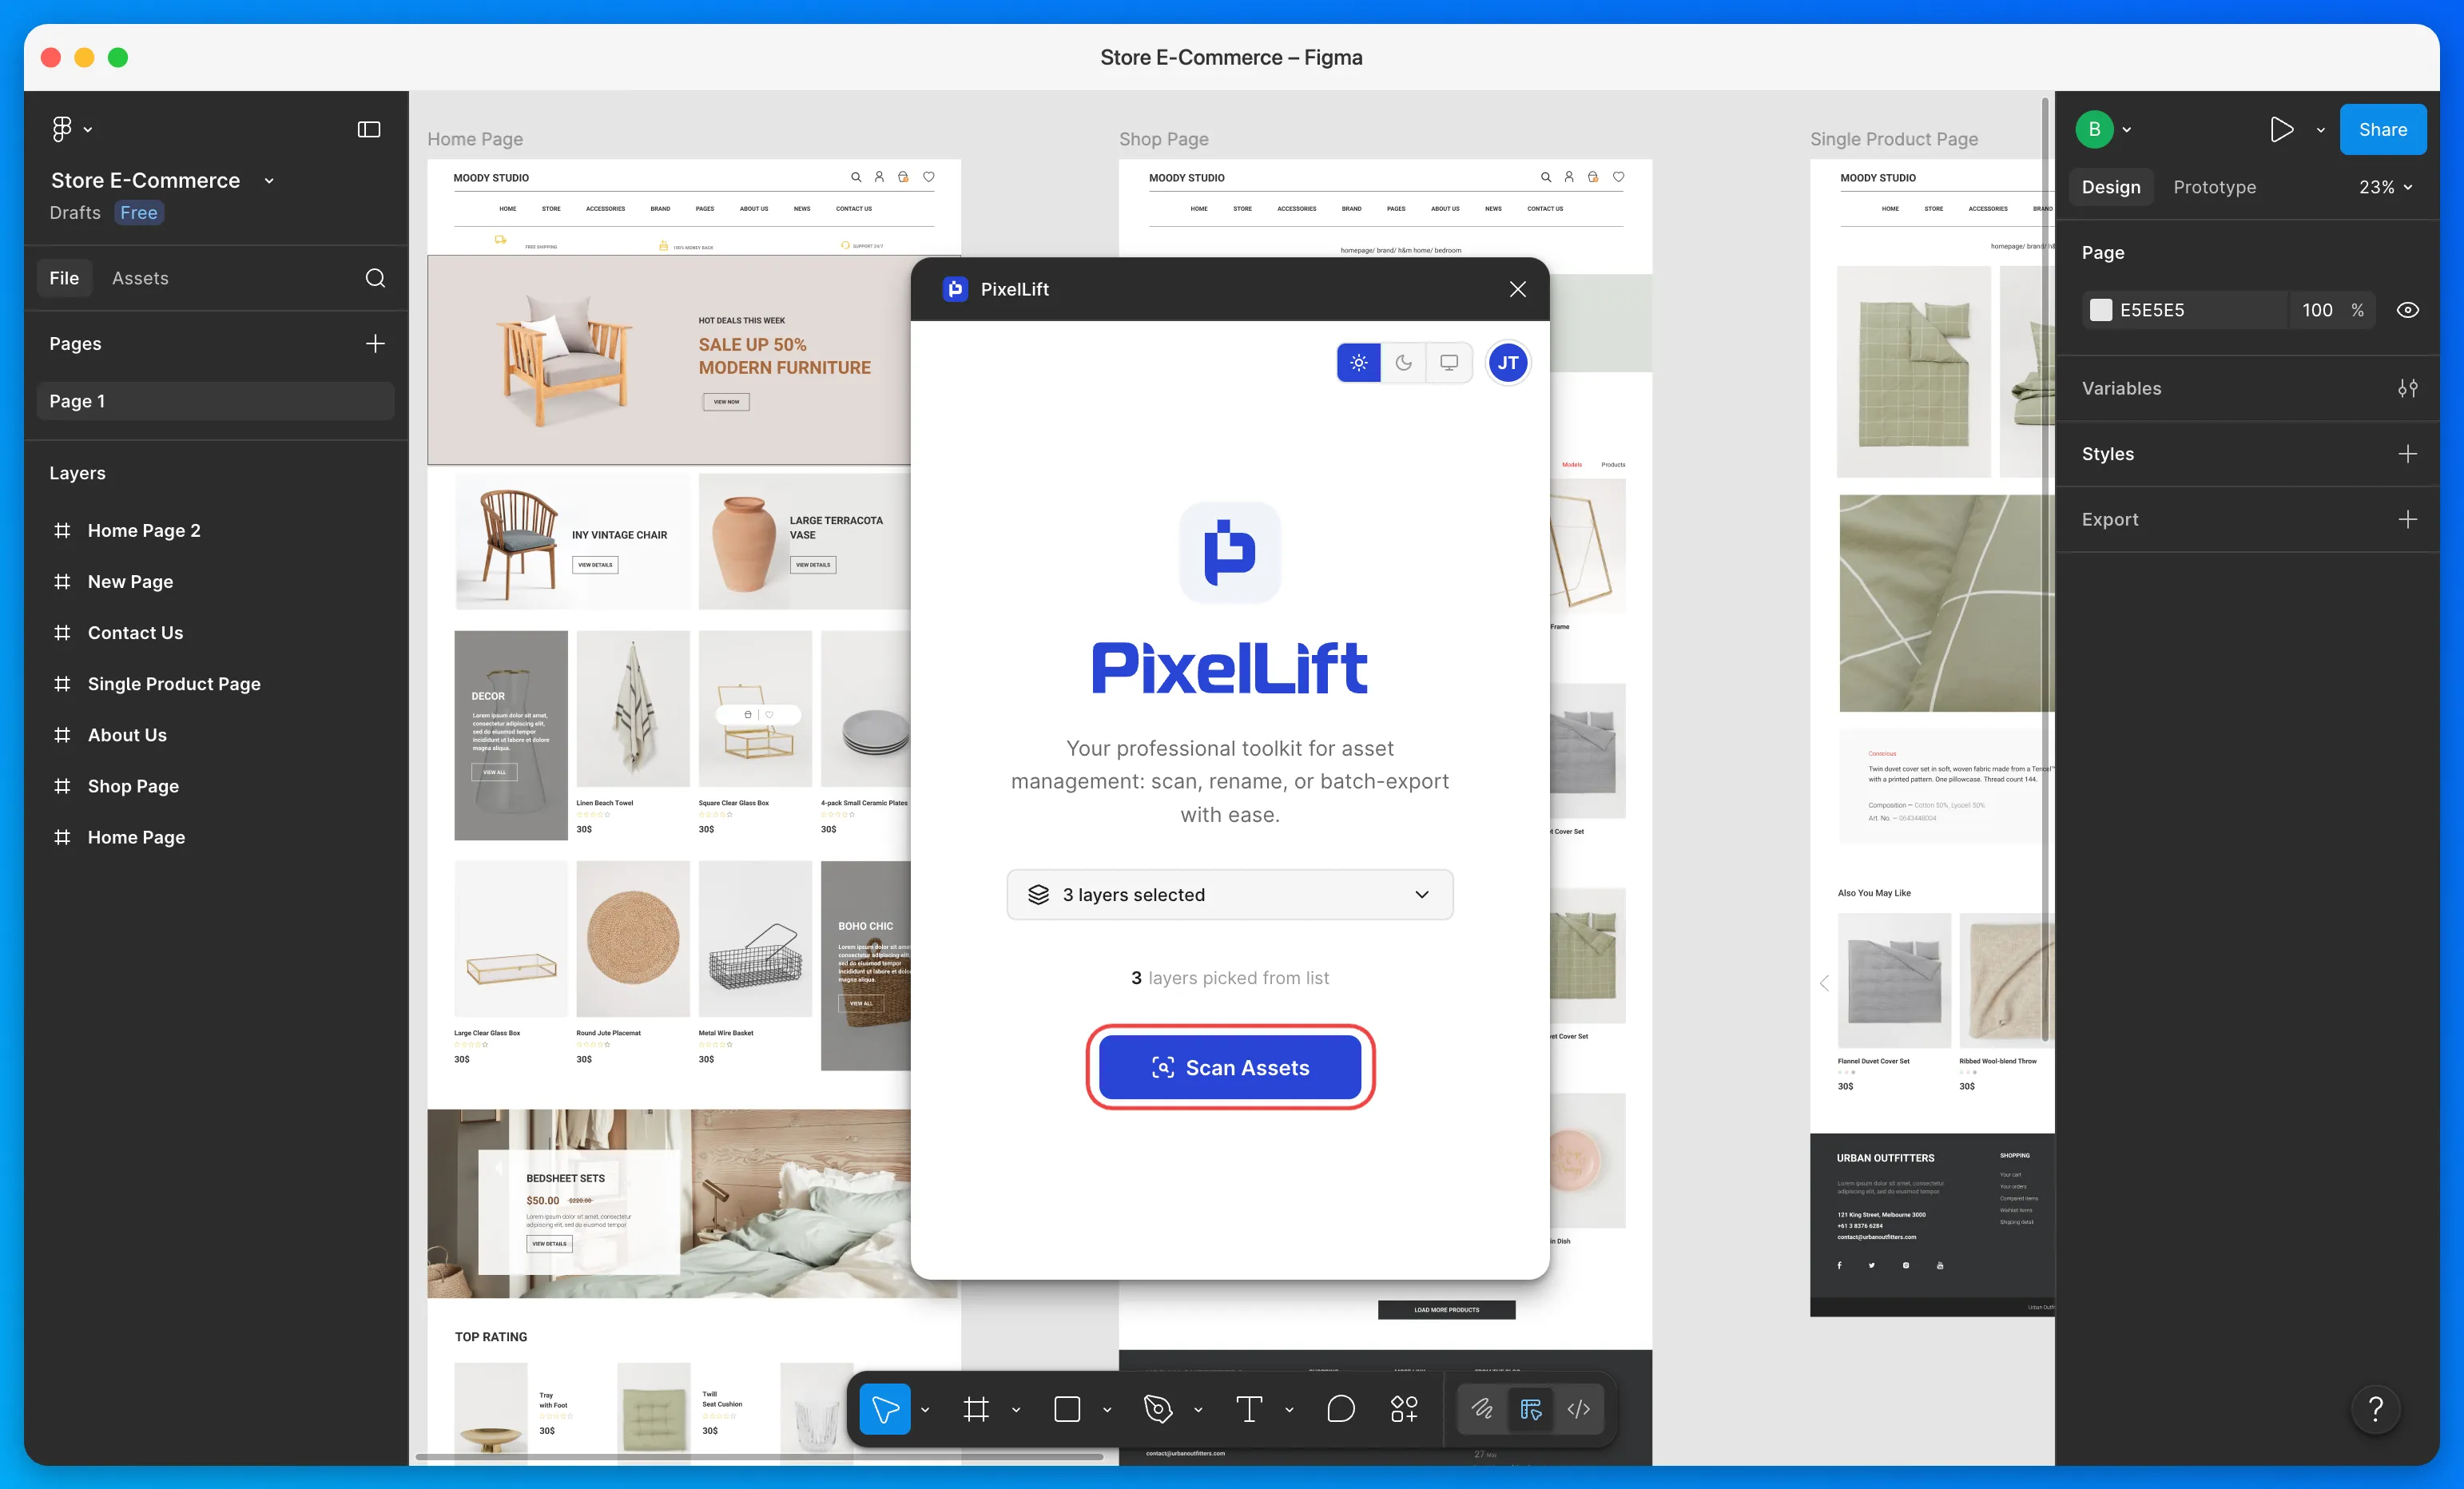
Step 3: Scan Your Assets
Click the Scan Assets button. PixelLift will scan all selected layers and surface every exportable image inside them, no matter how deeply nested.
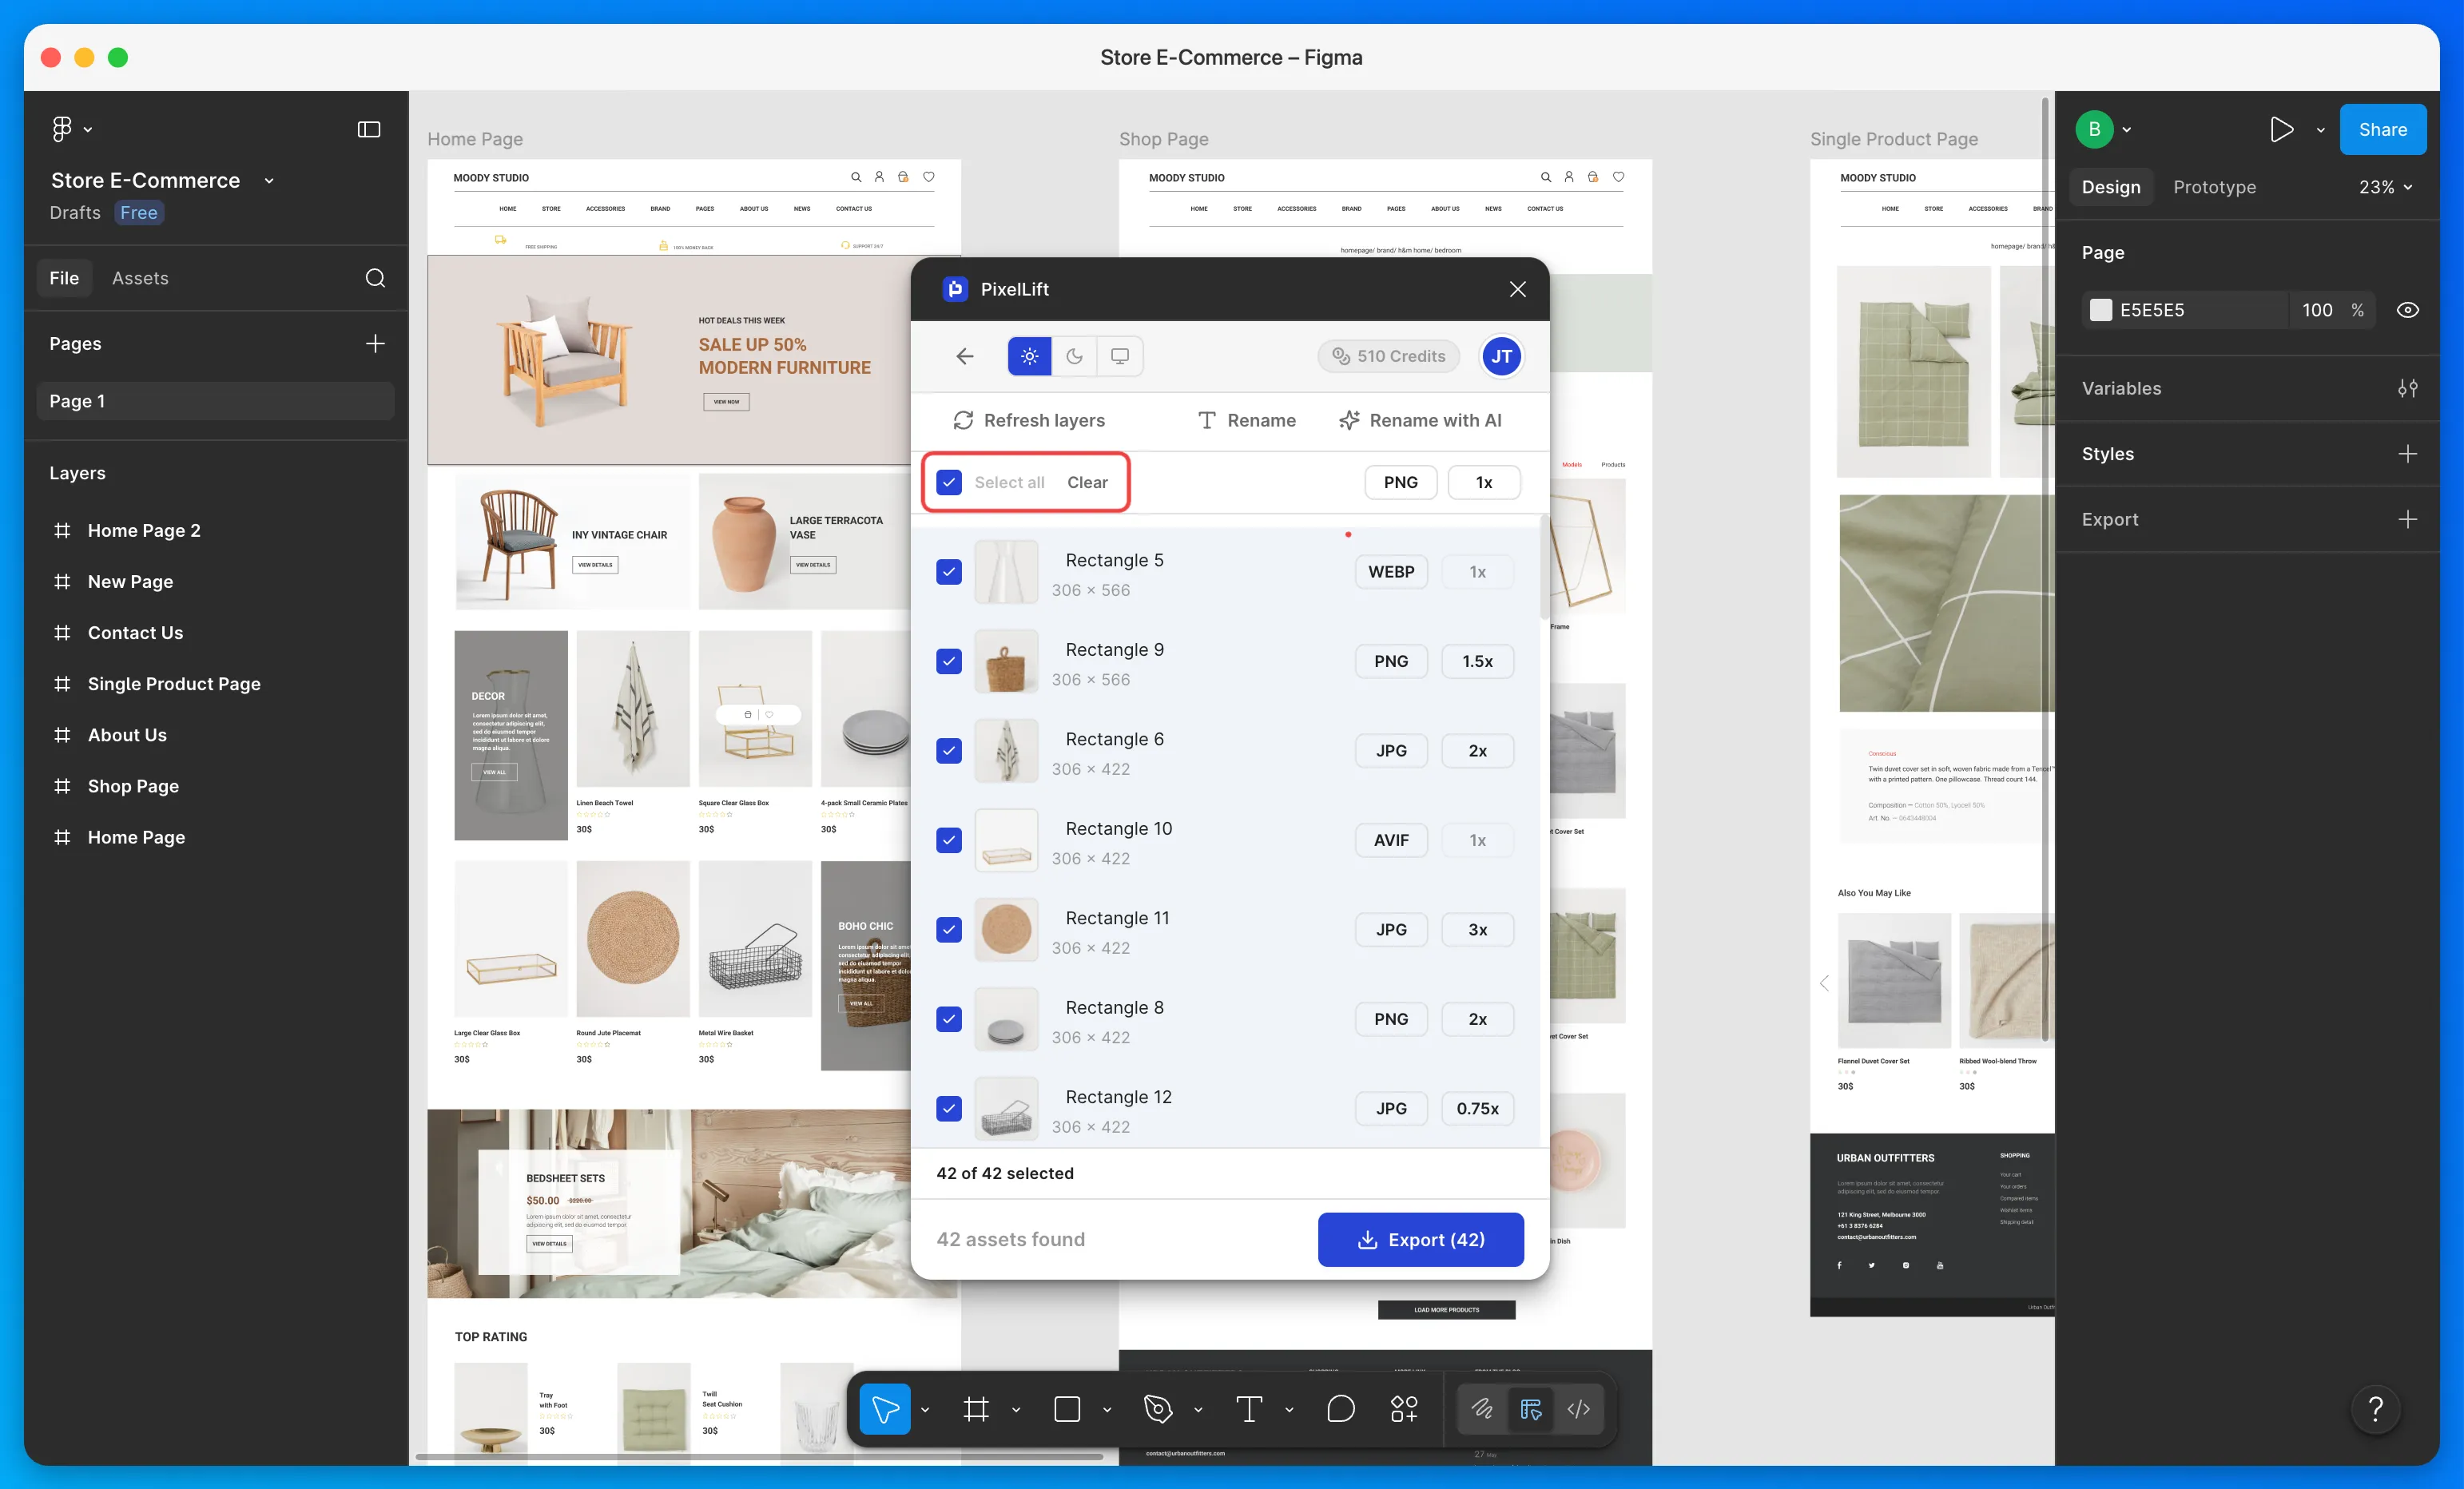
Step 4: Choose Your Images
Once scanned, all images appear in the list. Use Select All to grab everything or pick only the ones you need.
Step 5: Rename Your Images
Click on any image name to edit it inline. To rename multiple images at once, select them and click the Rename button to open the bulk rename modal.

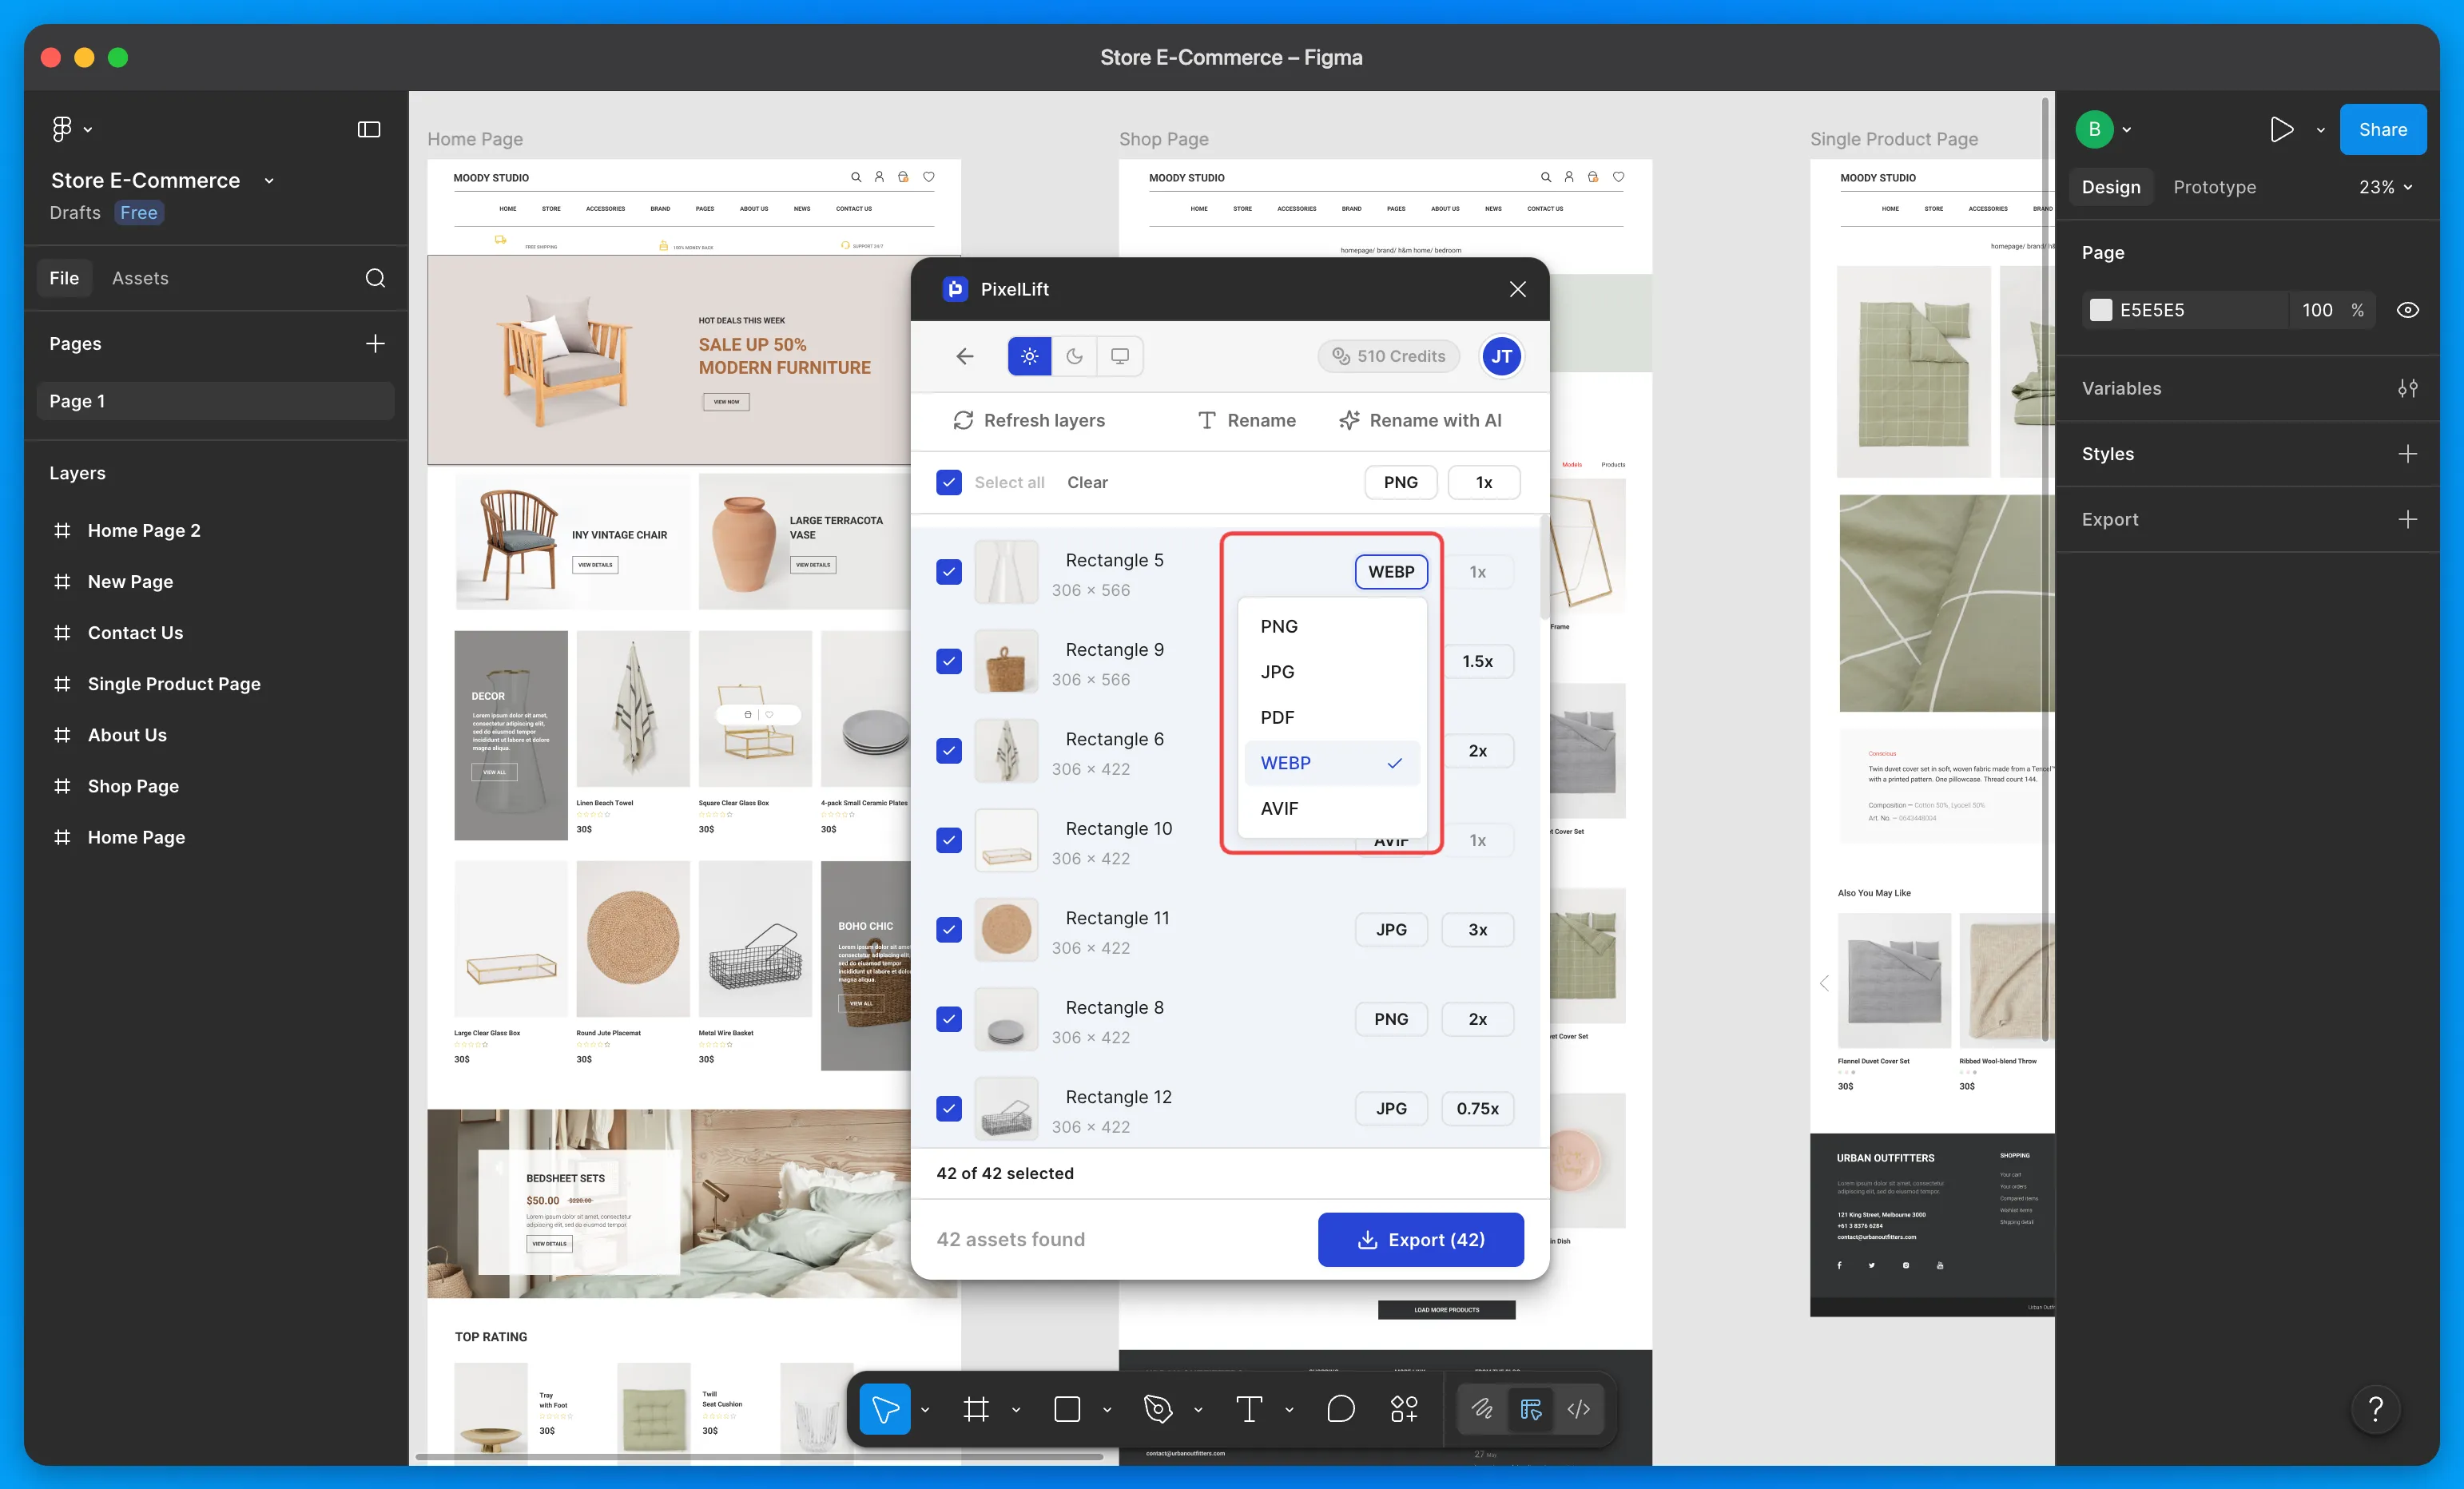
Step 6: Set File Format
Choose a format for all images at once using the universal dropdown, or set it per image individually. Default is PNG.
Step 7: Set Scale
Set the export scale universally across all images, or override it per image. Default is 1x.

Step 8: Export
Hit Export. Your images download as a ZIP file, correctly named, in the format and scale you set.

You can skip Steps 5, 6, and 7 to export quickly. PixelLift will use the original format, original names, and 1x scale by default.
Refresh Layers
If you update your layer selection in Figma after scanning, you do not need to close and reopen the plugin. Click the Refresh layers button to rescan your updated selection. Images from deselected layers are removed and images from newly selected layers are added automatically.

What's Next
Now that you have run your first export, explore the individual features to get more out of PixelLift.
Bulk Export
Export 50+ layers in a single action with full control over what gets included.
File Formats
Switch between PNG, JPG, WebP, AVIF, SVG, and PDF per image or globally.
Scale
Set export resolution per image or across the entire batch.
Rename, Prefix and Suffix
Rename images in bulk with tokens, numbering, and find-and-replace.
AI Renaming
Let AI generate descriptive file names based on what is in each image.
Quick Preview
Inspect any image before exporting and jump to its layer in Figma.